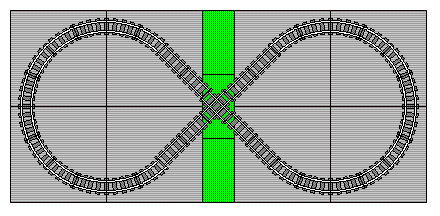
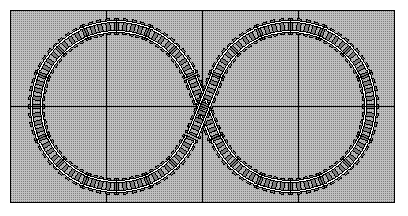
Here are some more advanced ideas for LEGO train layouts, while still keeping consistent with the restrictions of track geometry. While none of these ideas are original to myself (with the possible exception of the yard at the bottom), I hope this explanation will inform and inspire you to build better and hassle-free LEGO layouts.
Click photo to view on Flickr ↗

In 2008, I gave permission for someone from ITLUG, the Italian LEGO® Users Group, to put out a translation of this page into Italian. Their website is down, but you can see the Italian Translation on the Internet Archive. (EDIT 11-Oct-2020: updated URL to Internet Archive)
In 2026, the UK-based website LEGO® UK Railway wrote a modern guide to software you can use today to design track layouts. While my article (below) was written over 20 years ago, if you’re sticking to LEGO track (and not the 3rd party track that gives you more track shape options) the only real differences are that after discontinuing the 9V electrified rail track I based it on, LEGO introduced the (mostly useless) flexible track and the (hard to find) double-crossover track, and never produced a plastic rail version of the cross-intersection track element. All the stuff about the switch and curve geometry is still true of modern plastic LEGO track, though.
Notes
- This page was originally written several years before LEGO switched from powered 9V track to all-plastic track with battery trains. If you are using the all-plastic track you can ignore considerations of short circuits (see the Wye oh Wye? section).
- The all-plastic Flex Track piece is not included in this discussion; that makes some track shapes easier to achieve, though trains are more likely to derail on Flex Track than normal track that is assembled according to the principles on this page.
- The all-plastic Double Crossover track is also not included.
- In recent years a number of LEGO fan owned companies have started producing LEGO-compatible track, mostly in all-plastic but some have produced 9V compatible track as well. These offer myriad options for curve radius and alternate switch designs. In this article however I’m only looking at LEGO-made track.
Table of Contents
- Introduction
- Crossovers
- Changing Two Curves To a Straight
- Wye oh Wye?
- 22½° Diagonal Track
- 45° Diagonal Track
- Diagonal Track with Switches
- The Big Yard
- Track Designer files
Introduction
LEGO track geometry is very limiting. There are only a handful of available pieces. From left to right, these are: straight, curve, left switch (or point), right switch, and cross track (Cross track was never made in all-plastic. Also, plastic-only parts such as Flex Track and the double crossover are not included in this document. See Notes, above.):
Click photo to view on Flickr ↗

Each straight track piece is 16 studs long and 8 wide. The curved pieces produce a 22½° bend, so that 4 of them make a 90° turn. The switches have a different kind of curve in them, and they are meant to be used in conjunction with a curved track to produce parallel tracks. Here are some of the basic track concepts that are valid with LEGO track. Each one preserves perfect alignment with the studs on the large grey baseplate (48×48 studs).
Click photo to view on Flickr ↗

Straight track can go anywhere. But in order for the alignment of tracks to be maintained consistently through curves and switches, it is necessary to adopt some standards. The standard that works best is:
- Adjacent parallel tracks have a pitch of multiples of 16 studs; or put another way, 8 studs between tracks.
This is dictated by the geometry of the LEGO track switch, which creates parallel tracks of this pitch. - On a 48×48 baseplate, tracks may run down the center of the baseplate or 4 studs in from either edge. This is for symmetry and in order to preserve the previous rule.
- On a 32×32 baseplate, tracks may only run 4 studs in from either edge.
- Horizontal and vertical track segments must begin and end on a baseplate boundary, except for dead-end spurs.
If you follow these rules, you will never have trouble getting your layout to line up.
On first glance you may think this is too limiting, because the following restrictions would seem to be implied by the above rules:
- All curves must be 90°, consisting of 4 curve pieces.
- All switches must have a curve piece on the “spur” end to make the track parallel to the “main” line.
However, there are some additional things you can do with LEGO track geometry that do not violate our rules. This is because in the real world, there is a little bit of slack in the connections, and the studs can still be made to line up with certain alternate configurations.
Crossovers
A crossover is where you have two parallel tracks with a line connecting them. The standard way is to take the switch geometry described above, and create a crossover where the two switches line up with a pair of curved tracks in between. But look at the right hand crossover: it also lines up, only instead of the two curves there is a single straight piece:
Click photo to view on Flickr ↗

How does this work? Well, it turns out that 2 curved track pieces, when positioned at 22½° from horizontal, have the same amount of vertical distance between start and end as a single straight at that angle. Also, the horizontal distance is almost exactly double that of a straight.
But what if you put nothing in between? Then the tracks don’t line up right:
Click photo to view on Flickr ↗

DON’T DO THIS. The areas circled in red are not lined up properly. If you want these tracks to line up elsewhere on your layout you will run into problems. Just add a straight or two curves (or two curves and several straights, to make a parallel track in between). Remember, a switch is NOT the same as a curve!
Changing Two Curves To a Straight
It’s not just crossovers that let you replace two curves with a straight. Here are some other situations where this trick can help avoid unnecessary zigzagging of your trains.
Click photo to view on Flickr ↗ 
|
Click photo to view on Flickr ↗
|
Click photo to view on Flickr ↗ 
|
|
Click photo to view on Flickr ↗ 
Room for crossover - LEGO track layout diagram to separate them enough for a crossover without interfering with spacing on the rest of the main line. |
|
Wye oh Wye?
A wye (named for the letter Y) is one of the most common ways for trains to turn around, and it allows you to connect the loops of your layout in different ways for interesting variations.
Caution: a wye made of powered LEGO (or any DC model train) track will have a short circuit! You will need to electrically isolate the track segments in at least one spot in order to make it work. You can do this by inserting paper between the track pieces before connecting them, and then cutting away the excess. Of course, if you are using plastic track that consideration does not apply.
The wye on the left uses standard LEGO geometry, with 4 curved tracks in each 90° turn. In the one on the right, the double curves (3 sets of them) are replaced by straights. This shrinks the size and produces more reasonable curves.
Click photo to view on Flickr ↗

22½° Diagonal Track
Another convenient coincidence that comes in handy when designing layouts involves a straight track running at a 22½° angle. If you use 12 straight tracks with a curve at either end, you can still line up your track at both ends while having a more unusual track angle.
Click photo to view on Flickr ↗

This works because of the magic of Pythagorean triples. Like the well-known 3-4-5 triangle, you can make a perfect right triangle using dimensions of 5, 12, and 13. In such a case, the angle is 22.62°, which is close enough to 22½ that it works. Thanks to Jason Railton for pointing this out. But why is it 12, and not 13, you ask? Remember above where you can replace 2 curves with a straight? The 13th straight is replaced by the curves at either end of the 12. Note that a horizontal track of 12 units will line up nicely with the end of the diagonal track.
This trick only works if the begin and end of the turn are parallel. If you want to have the begin and end be perpendicular, you need an extra straight. Here’s why:
Click photo to view on Flickr ↗

45° Diagonal Track
There are no Pythagorean triples that produce anything close enough to a 45° angle, but we can use math to derive a result anyway. Trigonometry tells us that the distance traveled horizontally or vertically for each unit of diagonal movement is the sine of 45° (or cosine if you prefer; they’re equal for a 45° angle), or 0.7071. This is also half of the square root of 2 (1.4142). So we need a number that, when multiplied by 0.7071, produces something close enough to an integer that it will work with LEGO track.
The best choice is 17 straights, but you should be able make 10 work also. |
Click photo to view on Flickr ↗ 
|
Thanks to Larry Pieniazek, David Koudys, and Jeff Van Winden for their postings in a thread about this topic on LUGNET.
Note: this requires that the beginning and end be perpendicular to line up properly. If you need the beginning and end to be parallel, add a right angle turn (four curves) to the above. You can simplify it by replacing two of the curves with a straight, but you will still need to go the “wrong way” with one curve track in order for it to line up:
Click photo to view on Flickr ↗

Diagonal Track with Switches
You can add a switch and curve to each end, or replace the two resulting curves with a straight, just like we did in the earlier crossover:
Click photo to view on Flickr ↗

The result is a pair of switches separated by 14 straights. Put several of these together, and you have a switching yard:
Click photo to view on Flickr ↗

We can also do the same thing with a 45° track:
Click photo to view on Flickr ↗

The Big Yard
Here is a big switching yard that uses several of the ideas shown here:
Click photo to view on Flickr ↗

You can also find more ideas by Tim Strutt at his Brickshelf folder.
Track Designer files
When I first wrote this page, the gold standard for designing LEGO train layouts was the Track Designer program for Windows. However, that program is rarely used any more, and in fact the website that hosted it is no longer online as of 2020 (the link above is to the final Internet Archive version of the page). Track Designer was a pretty good program but the source code for it was lost in a disk crash and there was no backup, and so it was never continued or rewritten. These days, most people use BlueBrick instead to design their layouts, but I haven’t rebuilt these files in that program. If you do use Track Designer, here are the files for each of these examples (minus the text and arrows and such):
- LEGO Track Parts
- Alignment Examples
- Crossovers
- Bad Crossover
- “S” Curves
- Spur Line Curve
- Loopback
- Making Room for Crossover
- Wyes
- 22½° Diagonal
- 22½° Diagonal with Turn
- 45° Diagonal
- 45° Diagonal without Turn
- 22½° Diagonal with Switch
- 22½° Diagonal Simple Yard
- 45° Diagonal with Switch
- Big Yard
Images are now on Flickr, but TDL file hosting courtesy of BrickShelf. You can also view thee photos as a BrickShelf folder.
Written on Nov 21, 2003.
Posted on brickpile.com on Nov 2, 2006.
Last updated June 5, 2026.
Larry has posted a blog entry linking here. Since Blogspot doesn’t do trackbacks I’m posting it as a comment manually. Thanks Lar!
you have to make something like a idea for a big track with two switches, 17 straigts & 31 curves. if you do that than i can build a big city so please design something?????!!!!!
(p.s. what for program do you youse to design these tracks?)
This page shows some of the techniques you would use to design your layout, but what you need depends on how much space you have to work with. I don’t design custom layouts, sorry. The program I used was Track Designer which is a pretty old program; I think there may be newer ones available now but I haven’t tried them.
Not owning any Lego or Lego track, I wonder about Real World track fit. In particular, since your criteria for choosing number of track segments for “45° diagonal track” is to choose “integer lengths”, what would happen with 7 diagonal straight pieces, which to me, look attractive. Isn’t a shorter substitution more generally useful?
(from a guy into fudging the fit)
If you look at the table where I did the math, with 7 straight pieces on the diagonal you’d have a hard time lining it up with the rest of the track. There’s a lot of slop in the track connections though, so you can get away with a lot of things that I don’t recommend here because of the play in between track connections. However, that can cause derailing if it’s extreme enough, so to play it safe use the tips on this page.
LEGO has recently introduced some flexible track pieces which are 1/4 the length of a straight piece and have a hinge in the middle, so there’s a lot more you can do, but the new track doesn’t have conducting rails so it can only be used with battery-powered trains.
This is pretty cool. I have some little train track bought by grandpa in the sixties. Somehow, I have been struggling to reconstruct it. Thanks for the info. I am sure this will be very helpful.
Actually if it’s from the 60s it’s probably 4.5v or 12v track, and the geometry is different for those…
Hi,
I have been messing around with the atlas track designer and I have been having a devil of a time trying to get it to do the layout I want. I feel that it is possible I’m just not doing whatever it is I need to do to get it working.
What I am trying to do I have (crudely) sketched down below. Its basically the smallest reversing figure 8 I can make so I can fit it into the internals of my 4×8 layout. I would like to put a switch or 2 on that reversing section and draw a branch line off around the outside of the 8 but that will be easy once I get the 8 figured out.
If you could please let me know the pieces I need to put in to make it happen I would be grateful. Please email it to me at [email address deleted] it would make my day.
…….____________……
…../……..\…../………\
…/…………\./…………\
..|…………..|…………..|
…\…………/.\…………/
…..\____/…..\____/
note: I dont have to have the center overlap, a simple crossing of any standard degree would be fine.
this would also be acceptable (and preferible if posible) the “oval-eight”
…….____________……
…../……..\…../………\
…/…………\./…………\
..|…………..|…………..|
…\…………/.\…………/
…..\____/___\____/
LEGO has only one type of crossover, which has tracks meet at 90 degrees. That dictates that the minimum size of the layout would need to be 5’8 by 2’9.
If you let the tracks cross by having a bridge where one goes over the other, you could do it smaller.
I exchanged some emails with the commenter and realized what he wanted was more like these:
OH YES!
Very very nice, thats exactly what I was looking for. I am trying to get as much switching and track pieces as I can get into this 4×8 layout (realism is not in effect here) mostly to play with and I would like to use standard pieces without having to resort to flex track. I have never been very good at using that stuff.
Thanks so much!
In TD 2.0 what does the Z height have to be in order for a normal sized HO train to fit underneath for a crossover?
Thinking of how long a branch line has to be in order to cross back over the figure 8 mainline
The height features of Track Designer have never worked well for me. I think there are some bugs there. I just lay one track atop the other and worry about height only when doing it for real. But then, I’ve never tried to cross tracks that way in a layout. Hills don’t work well – the trains slow when climbing and zoom when going downhill – so our club doesn’t use them.
Probably you should be using BlueBrick instead of TD anyway … TD is totally unsupported, and the author doesn’t even have the source code. I keep meaning to make that transition myself, but I have spent too much time in TD. But if you’re just starting out, use BlueBrick. http://bluebrick.lswproject.com/
Hi Bill,
Are you aware of any third-party producer of LEGO-compatible 9V track?
Nope. I’ve seen plastic track made by some Chinese knockoff brand but not with the electric rails.
After reading Craig Bisgeier’s “The Ten Commandments of Model Railroad Yard Design” (http://www.housatonicrr.com/yard_des.html ), I returned here to locate the various parts in the Big Yard and was wondering if you have comments on the design considerations that went into the Big Yard.
Thanks.
I’m not familiar with those Commandments… the Big Yard I designed was mostly designed to fit the most complexity into the smallest space within the confines of LEGO track geometry, not so much to match any kind of realistic prototypical yard.
hi bill and others
i have a question about sidings i have tried to run 9V sidings but the circut isn’t complete (dead line) is there a way to have powered sidings? maybe using a pemblock, so i can run a small shunter and shift frieght cars.
also just to help you with one of the other questions. Me-models.com has now got aftermarket metal track that comes in the same geometry as 9V.
You can also make your own out of the newer non conductive track by applying adhesive metal striping usually used in Stained glass making. It’s freely available and carries current although i haven’t tried it yet. I have read from others who have successfully used it to increase there layout size. and they praise it for it’s value.
Will the Lego trains operate on ordinary O gauge track or do you have to use special Lego trac?
Thanks Chester
You have to use the LEGO track. We call it L gauge, which is an accepted NMRA standard.
Do you know if the chinese nock -off brand of lego trains work with RC track? I am talking about Enlightment
Don’t know, don’t care. I don’t use knock-off brands.
In the last layout by Bill before my post, can you please tell me how many of each track piece is required? I am VERY new to trains and will be getting my first one tomorrow.
Thanks!
I’m not sure which layout you’re talking about, but if you look carefully at the image it’s not hard to count the track segments yourself.
The Enlighten brand of knock-off track does work with the RC Lego track system. My mother bought me some when my wife told her about my love of Lego trains. They do work nicely, once you get past the difference in colour.
Beside’s the new Flex Track that you already mentioned there’s also 7996 – Train Rail Crossing.
Good point Claudio… I tend not to think about the plastic track, since our club uses 9V for the train layouts.
Thank you for idea!
I’m begin in LEGO train and search good idea for my big city and train tracks system (20 X 20). And Im can not made, a good town plan tracks in main brain. This web page, and you idea is very, very helpfull and usefull in practics LEGO train. Thank you
You’re welcome
Do you have any pictures of the track opening where you can go in and out of the middle of the track layout. I wanted to see how you made the connections and also how and if you cut the track pieces by the hinges. Thanks for your help.
All the connections are standard LEGO parts connected in standard ways. There’s no cut parts or anything like that. If you’re using 9V track, you may need to electrically isolate portions however.
Great thanks for your quick help.
Well… Is there a similar discussion for Duplo tracks anywhere ? I am having a real hard time doing anything a bit interesting for my kids ! I did not expect it to be so involved !
I’m not aware of any but if you find one please post a link here.
I’ve tried the crossover you show at the top. It’s close, but not close enough to actually fit on two 48 baseplates like you’re showing. Gonna try on smaller baseplates to spread the gap if you know what I mean…
The crossover with one straight track between the two switches works fine, but it makes the “main lines” kind of far apart. But we have done it many times in club layouts.
Exactly; so if you have it all on smaller baseplates it’ll work, but if you put it on 48 baseplates like in your picture it just won’t fit.
The pictures are all to scale. Our club standard is to put 4 studs of open baseplate between the edge of the baseplate and the track. Using that standard it fits fine.
How do you attach the curves to the plates when they don’t line up on studs? Do you just use 1×1 on points of contact where they do line up?
We don’t. Our club (BayLTC) doesn’t attach the tracks at all – we let them float on top of the baseplates, and only anchor the track down in a few areas – for example I have a level crossing MOC, and we have a customized lift gate which has the track permanently attached to the wooden structure. But everywhere else we just have track floating.
If you do anchor it down, put a layer of plates between the track and the baseplate, and use tiles under the curved track.
Nice details on possible connections… Is the TD 2.0 software still available?
Mike, I think the TD software may still be floating around but I don’t recommend using it. It’s very old Windows code and buggy. The BlueBrick software linked in the comments above is newer and better. I should create BlueBrick files for the examples in this article, I supose…
Advanced LEGO train station track geometry using flex track piece, but still for 9V operations:
http://www.brickshelf.com/gallery/AshiValkoinen/BuildingTricks/000_geometry.png
This station has 5 tracks and one dead end. The inner two tracks run on standard geometry, they can be connected simply with points at their ends – or with modified points to keep both tracks running paralell all around the layout.
The outer tracks (track 1 and 4, refer to image) have a special geometry. After the points between track pairs 1 & 2, and 3 & 4 I put two straight and then a curve to make them paralell with inner tracks (track 2 and 3). Using a straight with 22,5° angle difference to inner tracks results in 1 studs shortening in length – 1 stud for each 1 straight put in that angle. Two straight on each side result in 4 stud shortening – a perfect length to use a flex track. The distance between edges of track 1 & 2 or 3 & 4 will be 19 or 20 studs – depending on how much you stress track connections. Stressing them more results in 19, letting track joints a little apart result in 20. I’m used to run 8W trains so I built 17-18 wide platform between these tracks.
This geoemtry can have some additions – a 5th track can be connected to track 4 with standard geoemtry rules – just don’t forget to start it after the flex piece has been placed in track 4. The whole 5th track will have a 2 studs offset from baseplate edge – but ballasting with tiles on those 2 stud will solve dismantling and reconnecting problems. Also there is an another track, named 1a, it is a shorter track for shorter, local trains (as end station) or just storing a loco there.
All track segments can be driven by 9V speed regulator if both end of the station had 9V inputs (it is quite regular by bigger layouts, loops, sections and with heavy 9V trains due to voltage loss). Track 1 and 4 also can store two 9V-based trains independently (if station is long enough of course).
I have noticed that with the emerald night it helps when you come out of a switch to have a piece of straight track.
Yes. The curve in the switch is the sharpest curve in LEGO’s track system. So going from that to another curve in the other direction is even more stressful than a normal S-bend. I don’t recommend having the “main line” of your layout follow the switch from a curve as a result, though having it go through a straight would make it easier on the trains — but it would ruin the geometry in many cases.
This is so cool! Thanks for sharing! :-)
Hello I have 2 questions, for a big 9v train layouts do you need more than 1 Regulator to power the whole track without a shortage of power or do people use only 1 Regulator that extends multiple contacts from that Regulator to other further away stages of the track? If a 9v layout was to have more than 1 Regulator wouldn’t it be inconvenient to control the speed of the extra Regulator that is further away or do people just extend the 2nd Regulator to be close together? Thank you.