
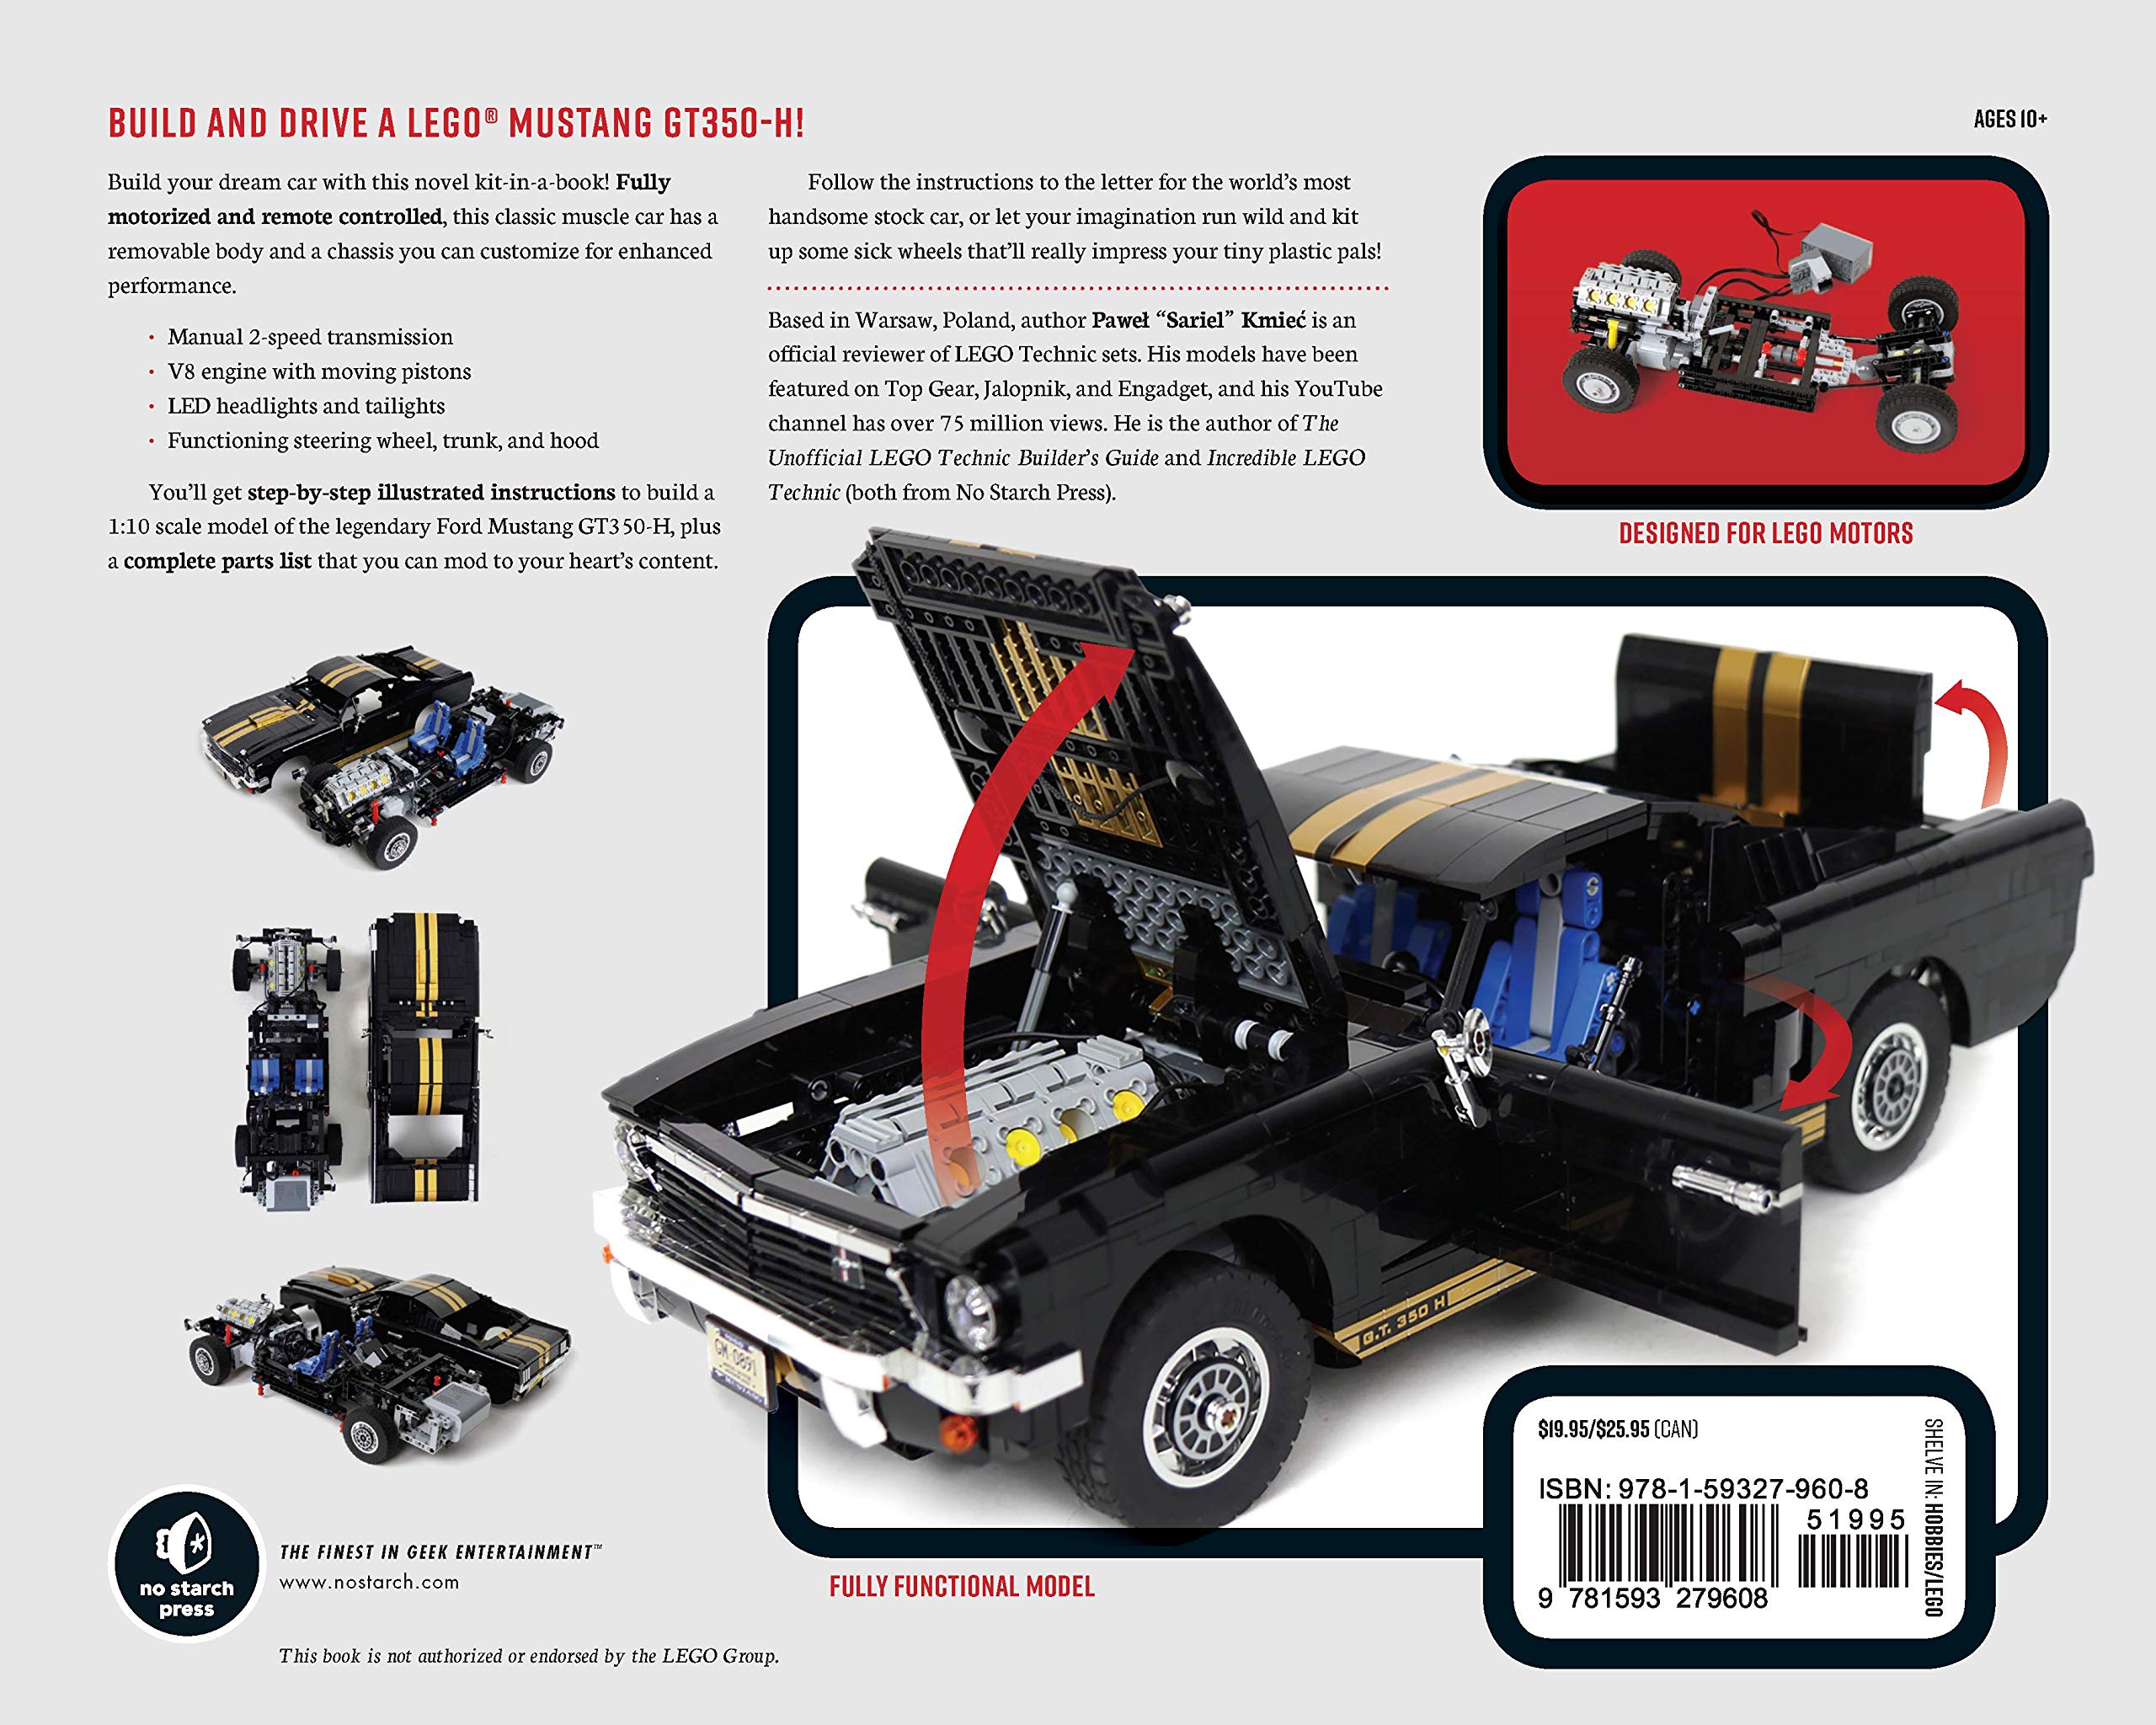
I’ve been an admirer for some time of Polish LEGO fan PaweÅ‚ “Sariel†Kmieć from Warsaw, Poland. He builds some of the most brilliant LEGO scale model vehicles I’ve ever seen and is a wizard with TECHNIC mechanisms. One of his models, the Shelby GT 350-H, has been made into a book, Build a LEGO Mustang. As of this writing, Amazon offers it for US$13.99, discounted from the cover price of US$19.95. Here are the front and back covers:
Tag: Technic

Matt Walsh’s Tile Dispenser
This past Saturday, Matt Walsh came to the BayLUG meeting and bought some parts, and built this cool little mechanism. Watch the video and he explains how the whole thing works.
Review: New LEGO Technic Idea Books
There’s something new for LEGO Technic fans from No Starch Press.


These books from Yoshihito Isogawa are a great guide to all the wonderful ways you can combine LEGO Technic gears and related elements. I’ve always been a little wary of Technic myself. Even though I got an Expert Builder parts pack as a kid, I never did a lot with it. (I was probably too young, since I was only 6 when that set came out in 1977.) I’ve built a number of modern Technic sets, most recently the Lego Technic Crane Truck 8258, but I’ve only done minimal work with designing my own Technic machinery. Mostly what I’ve done is simple gearing such as my Scrambler amusement park ride, but I always seem to have trouble getting the gears to do quite what I want without either destroying the gears, skipping teeth, or woefully misjudging speed and/or torque.
The first book is The LEGO Technic Idea Book: Simple Machines which shows a myriad of different ways to combine LEGO gears and pulleys to achieve particular gear ratios and directions. If you’ve ever scratched your head wondering how to get a certain speed or torque out of a LEGO motor, your answer is in here. Even the most experienced builders will certainly find something new they can use. For example maybe you know how to get the gear ratio you want, but the mechanism you’re thinking of is too bulky to fit into the model you’re working on. Take a look through this book and there’s a good chance you’ll find a better way to get the same effect in the space that you need to fit it into.
The LEGO Technic Idea Book: Fantastic Contraptions is full of clever ways to combine gears, pulleys, springs, and magnets to create models that move. There are ideas for shooting projectiles, building shock absorbers, and even using magnets to animage LEGO minifig scenes. The only problem is that the magnets shown have been discontinued (due to fears that a child might swallow magnets which would get stuck in their digestive tract and require surgery – for example, the new train sets have a redesigned coupler with a magnet permanently affixed), so that might be frustrating to some people without extensive collections of older parts.
Finally, the The LEGO Technic Idea Book: Wheeled Wonders is full of great ideas for LEGO vehicles. Drivetrains, steering mechanisms, and other vehicular ideas are illustrated in full detail.
The examples in these books are purely pictures. There are no verbal explanations, which you would think would be a problem. But the pictures are reduced to such a level of simplicity that it’s easy to understand the mechanism without any text, and if you build them you could easily understand how they work. There are a lot of tips that show ways of combining gears that I had never thought of, and as I was flipping through it I kept thinking “Oh, that would be good for X” type thoughts. The lack of text would also be helpful for younger kids or people whose primary language is not English (or Japanese, in this case).
I think the one area where this could have been improved would be to show more complex ideas – instead of just showing the simple combinations of parts to achieve a particular kind of connection, show ways to combine these together to create more intricate machines. Some of the examples in the Fantastic Contraptions and Wheeled Wonders books do this to some extent, but I’d prefer to see that taken to a higher level. Also, instead of just showing each model from a variety of angles, I’d like to see step-by-step building instructions or to see some of the simpler modules combined together to create more detailed ones.
One area that isn’t explored very well is motorizing the sets. There are some examples that use motors, but they are largely built using the older 9V motors instead of the current Power Functions parts, and with the Power Functions remote control system, there are a lot of things you could do that aren’t covered by these examples. Hopefully they will come out with a fourth book featuring Power Functions.
All in all though, these are excellent books showing a lot of great ideas for LEGO mechanisms. Even if you’re an experienced builder, there are surely some ideas in here you’ve never seen.
- The LEGO Technic Idea Book: Simple Machines
- The LEGO Technic Idea Book: Fantastic Contraptions
- The LEGO Technic Idea Book: Wheeled Wonders
Full Disclosure: The publisher sent me a free review book and sample galley, and the product links in this post are Amazon affiliate links. Besides Amazon, you can get the books from No Starch Press directly or through their distributor O’Reilly.
Road Bridge
In 2003 (or maybe 2002) I built a bridge for the BayLTC train layout. But it wasn’t a train bridge, it was a road bridge (for cars and trucks).
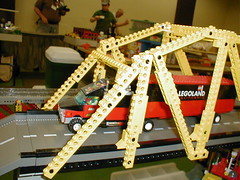
The road pieces came from LEGO’s 6600 Highway Construction set, and the bridge’s structural elements were built of Technic bricks.
Most of the angles in the bridge truss design follow some multiple of the 3-4-5 triangle. This is one of the most useful laws of trigonometry: if you have a triangle with sides 3, 4, and 5, or any multiple of that (such as 30, 40, 50) then they will form a perfect right triangle (a triangle where one of the angles is exactly 90 degrees). Why? Because of the Pythagorean Theorem: in any right triangle, the square of the hypotenuse (the side opposite the 90° angle) is always equal to the sum of the squares of the other two sides. And it so happens that 32 + 42 (9 + 16) is equal to 52 (25).
In LEGO, the 3-4-5 triangle is achieved by attaching pieces in distances of 4-5-6 studs. Why? Because of the “fencepost effect” – if you make the connection on the 1st and 4th stud, that’s actually a distance of 3 (since 4-1=3). The same goes for the 4 and 5 unit length sides. In this model, the center trusses are formed by 3-4-5 triangles scaled up by a factor of 6. So the “4” sides (the vertical) are really 24 (actually 25, because of the fencepost effect) tall. The angled trusses are made by sheer guesswork, however. Luckily, there’s enough slop in LEGO connections to make it not really be necessary to always get it just right. When working on this, I built what I called a “Pythagorometer” – a model of the 3-4-5 triangle at various scales – to try to make the angles work out. I’ll post more about that later.
I recently discovered a batch of pictures of this bridge that had never been posted online, taken at the July 2003 GATS layout. You can see them at a Flickr gallery.